Sewing for Boys: part 2
This weeks task was to make a cushion cover. First off we had to practice two seams. The first one was a straight forward seam with the rights sides together then sewn with a straight stitch, but using the marking on the sewing machine plate to get a guide width of 5/8 of an inch. Fine and dandy and not too many problems. The French Seam which was to be for more delicate fabrics where the seam is hidden, was more of a problem, but I got there in the end.

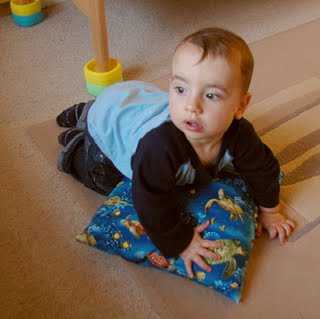
Jamie gets to road test Daddies cushion.
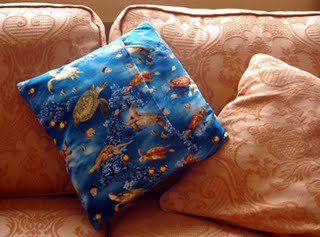
Then it was on to the cushion. I had chosen quite a bold fabric as I was going to make a cushion for the sofa in my son's room. He is still in his cot so we have enough room for a sofa in his room. I chose the turtle fabric as it is a nice strong theme and the blue would liven up the sofa.The cushion was made up of three panels, one 16 inch square and two 16 x 12 inch panels for the backing. I tried marking out the fabric as correctly as I could and then cut it with scissors. Now I had not appreciated how hard this was going to be to follow a straight line with scissors. I can see the advantage of a rotary cutter to get nice straight lines. After putting a tidy seam on each of the back panels, the three pieces were pinned together. I can't say that I found this supposedly simple task too easy either and I think there must be some tips that I can glean from the shop.
Anyway we were away and stitching round all sides of the square to make my cushion. I was pretty pleased as I came to the end and then turned it inside out to reveal... Yep I hadn't put all the front sides together and now the front of my cushion was the wrong side. I wasn't the only one to make this basic but really annoying mistake. We had run out of time at the class so I would have to unpick at home and do it again.
At home I was using an old Bernina sewing machine of my mums. It had lots more buttons to press, an LCD screen but after a bit of work I had the bobbin loaded, straight stitch selected and was ready to go. Things did not go well, I could not follow a straight line and the stitching was going off all the time. I had to unpick three or four times, until I marked the straight lines on the fabric and then I could follow that. I think I might not have been going fast enough and wasn't letting the machine do the work. Eventually though it was done, I turned it inside out, pushed out the corners and loaded a cushion inside. Despite all the errors I am pleased with the result.

The finished cushion in place.
Lessons learnt:
Pinning is harder than it looks to make sure the fabrics don't pucker up.
Sewing in a straight line and following a guide isn't that easy and needs practice.
Double and then triple check that you are sewing your fabric pieces the right way round!!
Cutting a straight line with scissors takes practice and a rotary cutter goes faster.
Next week is a door-stop!!


Comments
Congrats, it looks great and if baby likes it, that's all that matters!
The turtle cushion's lovely and just the sort of fabric to appeal. Am dead impressed by your efforts.
Theo has just become very interested in scraps of fabric, especially those with little cars and trucks on, so I'm bowing to pressure and making him a 'Things that Go' quilt...
(PS I have no idea what a purple thang is either!)
Ellie
I was so frustrated sewing the wrong sides together especially as they went together quite well. Then after unpicking I couldn't sew a straight line to save my life. Adding an unpicker to my essentials kit!
Ellie and I worked as archaeologists in Cyprus (my other job) some years ago now. I have some photos of loomweights and spindle whorls from the site that I will put up some time. They are about 3200 years old and the stone spindle whorls are very nice.
David